If you’re excited to dive into Satisfactory with your friends on your own dedicated server, this guide will walk you through the process of setting up and connecting to your Satisfactory server. Whether you’re new to the game or setting up for the first time, follow these simple steps to get started!
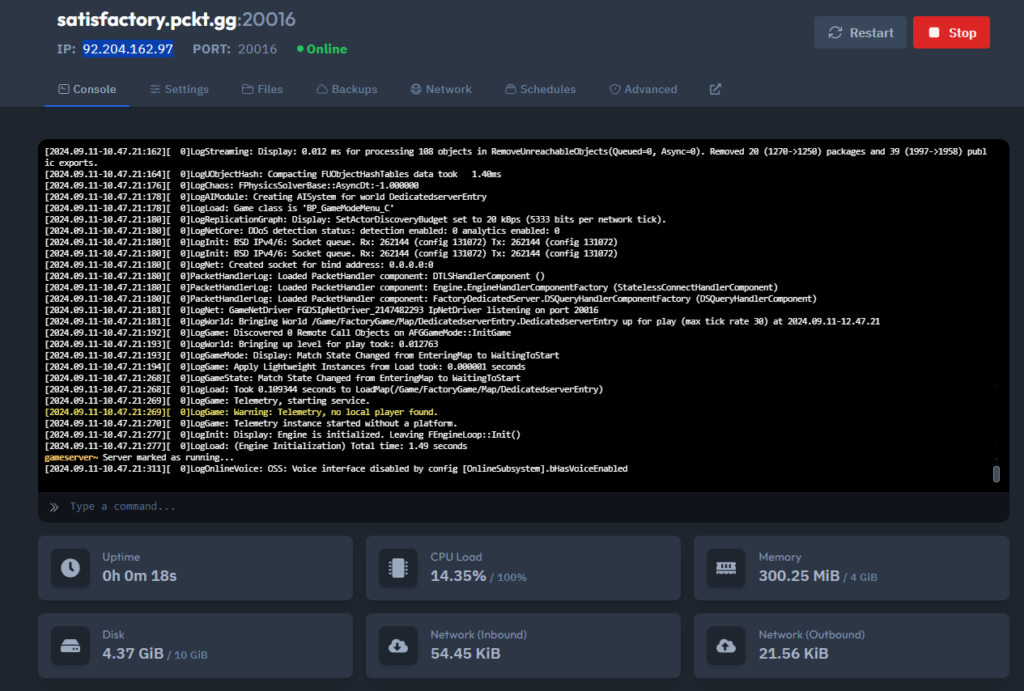
Step 1: Copy Your Server IP from the Server Panel
First, log into your server hosting panel and locate the IP address of your Satisfactory server. Make sure to copy this, as you’ll need it for the setup process.
Step 2: Open Satisfactory and Access Server Manager
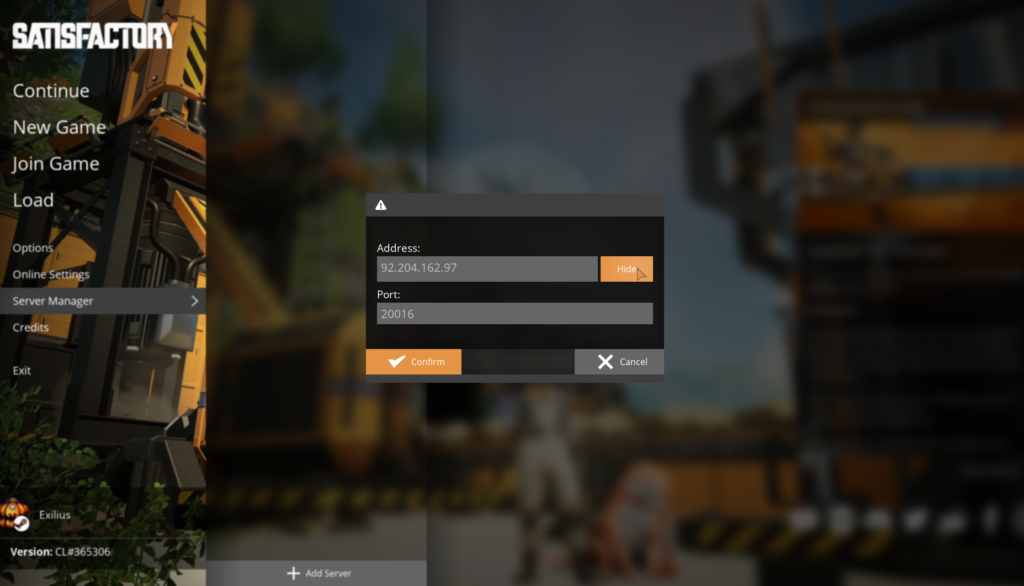
Launch Satisfactory and go to the Server Manager tab. This is where you’ll manage server connections. Once inside, select Add Server.
Step 3: Enter Your Server IP and Port
Paste the server IP you copied earlier and enter the port number provided by your server host. This is usually displayed alongside your server IP in the panel. Confirm the details and proceed to the next step.
Step 4: Claim Your Server and Name It
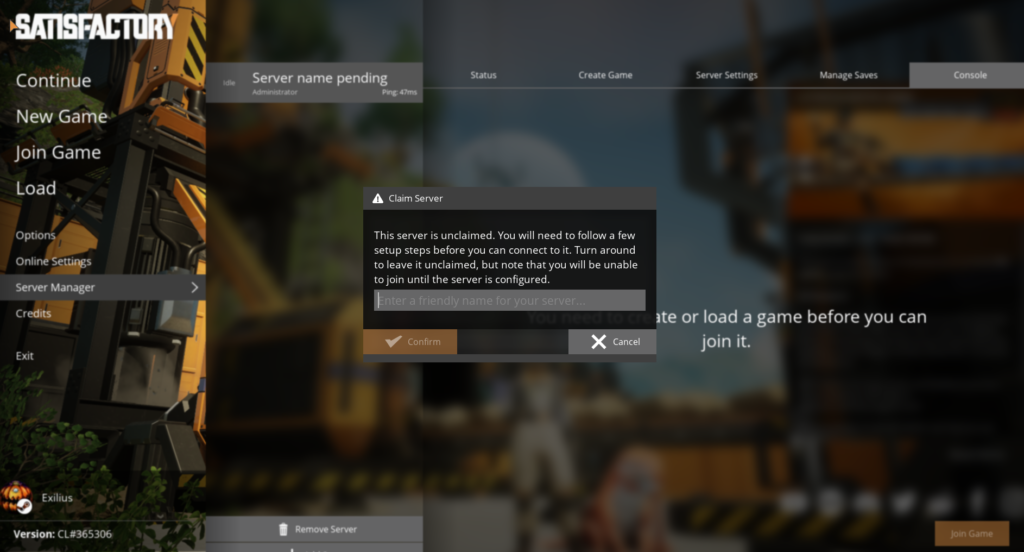
After entering your IP and port, a pop-up will ask you to claim the server. This is where you can give your server a unique name for easy recognition.
Step 5: Set an Admin Password
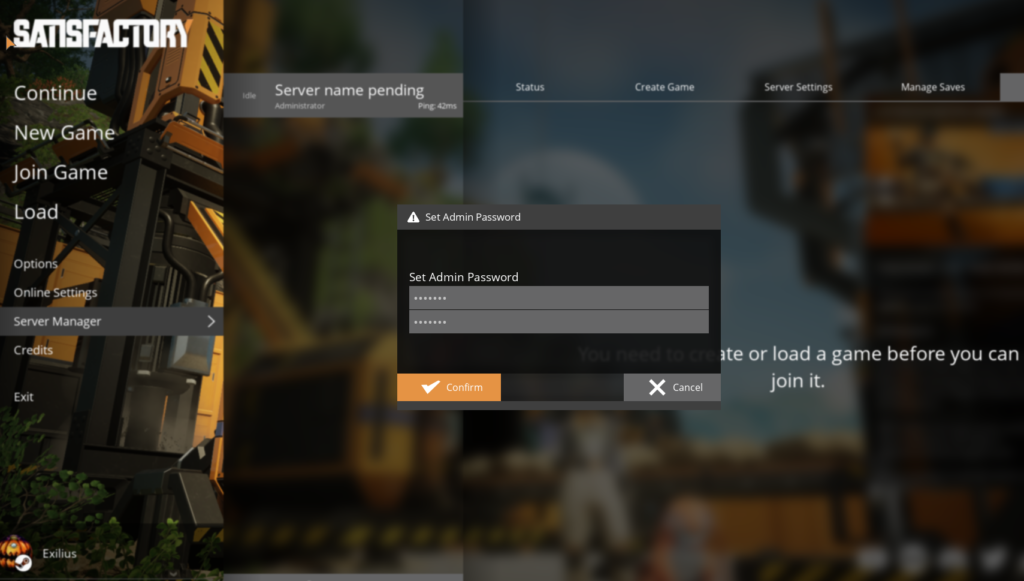
To secure your server, you’ll be prompted to set an admin password. Choose a strong password that you can easily remember, but that’s also secure.
Step 6: Create or Load a Game on Your Server
Now that your server is set up, you can either create a new game or upload an existing save file.
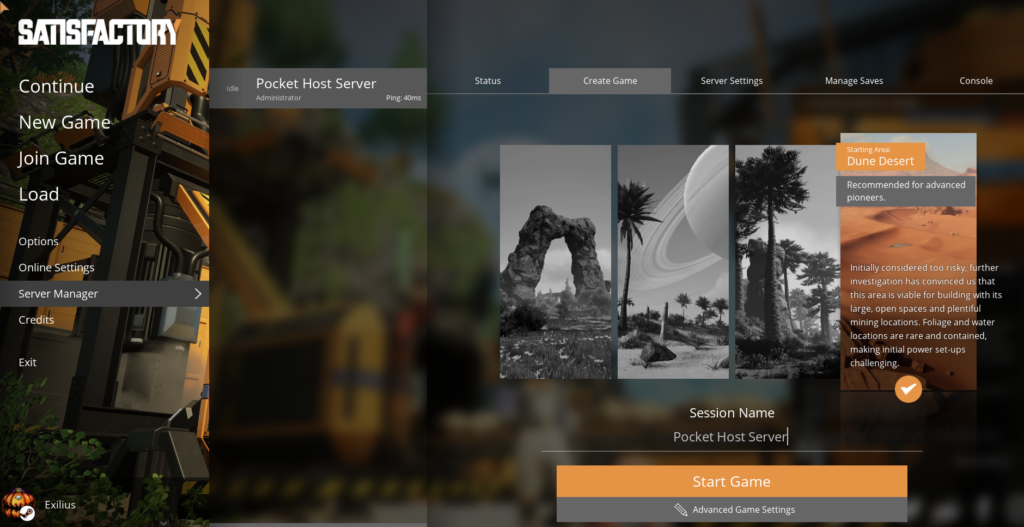
Creating a New Game: If you choose to create a new game, simply select a spawn location, name your session, and press Start Game. You can also adjust additional server settings by clicking on Advanced Settings.
Uploading an Existing Save Game (Optional): If you have a previous game you’d like to continue, navigate to Manage Saves and click Upload Save. Select either a manual save or an autosave file to upload.
Step 7: Load Your Save Game (Optional)
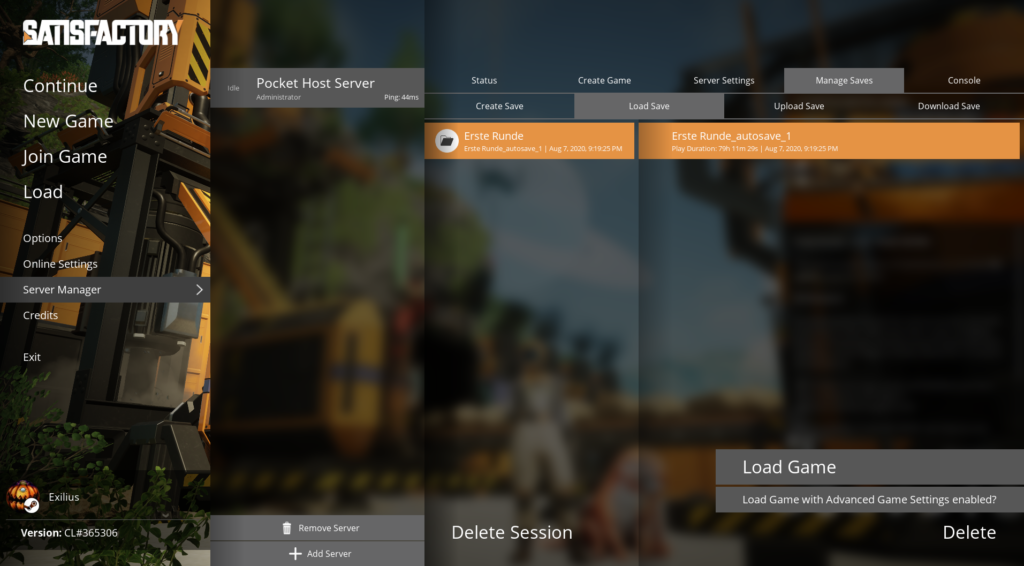
Once your save file is uploaded, go to Load Save, select the uploaded save file, and click on Load Game. If you want to customize the server settings further, you can choose to load the game with Advanced Settings enabled.
Step 8: Wait for the Server to Set Up
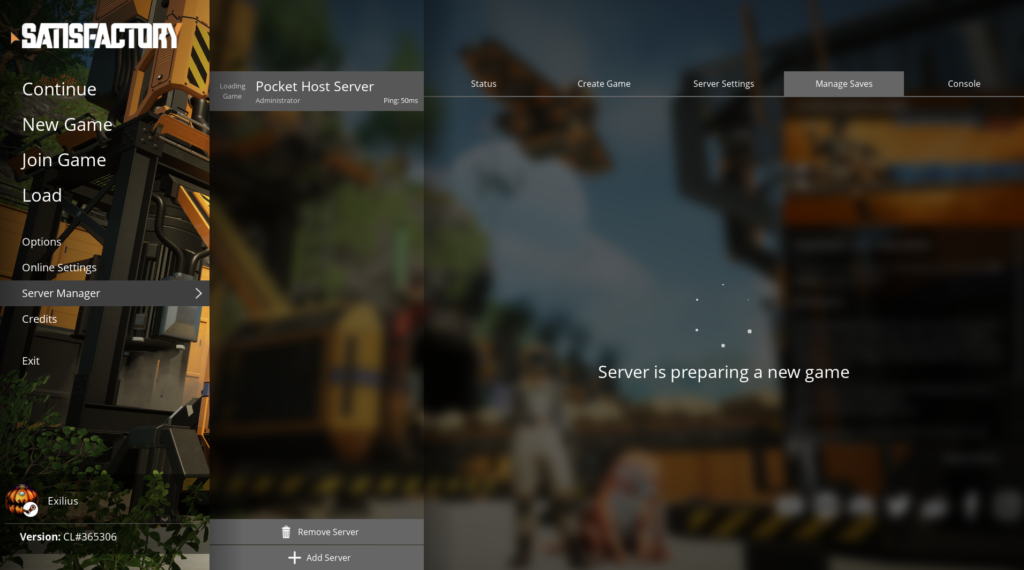
The server setup process may take a few minutes. Be patient as the game prepares your server environment.
Step 9: Join Your Satisfactory Server
Once the setup is complete, simply click the Join Game button to connect to your Satisfactory server and begin playing!
